Tuesday, November 26, 2013

Goddess Gets Glam

In honor of our location in Tarpon Springs
(aka "Greek Town")
We spent some time giving this beauty a make-over befitting of a goddess


We started with several coats of Bauhaus Buff from Amy Howard at Home,
applied right over the existing finish
(Chalk Paint and dried wax)
Bauhaus Buff is a gorgeous color,
but I wanted to add more warmth and age

Using Amy's Dark Wax as a base, 
I mixed three parts Dark Wax with one part Mineral Spirits
to create a glaze
(I don't like my glaze too runny, but you can do 50/50)
It's really not an exact science...
just add enough Mineral Spirits to thin your wax

Working in large sections, I applied the glaze with a brush,
really working it in to the recesses
(an inexpensive chip brush works GREAT for this)

Before moving on to the next section,
 I used a clean, soft rag to wipe away the glaze

On the areas where I wanted more dramatic shading,
I applied Dark Wax (undiluted) with a small brush
and did NOT wipe away

Once the process was complete and the wax was dry
I lightly buffed the surface

Now she gazes over the door, welcoming all who enter

Michele

Thursday, November 21, 2013

Dust of Ages

Being at the shop all day, nearly every day
is making me VERY productive...

Of course, the fact that I'm leaving my laptop at home
MIGHT have something to do with it, too!

In any case, I'm really enjoying 
playing around with all the new products
we're carrying

It's rejuvenating, in a way,
testing out all these new goodies!
I'd become so used to one product...
I know it inside out and upside down
Certainly time to mix it up!

We've had Dust of Ages for awhile,
ever since we first tried Amy Howard's products

The colors we ordered were mid-tones,
and the Dust didn't really show up too well 

I put it aside, and forget all about it

Until today. 


I was working on the chair you see in the background
I love the soft, cool tones
(Credenza from AHH and Fluff from Dixie Belle)
Not wanting to alter the color too much
nor warm it up with dark wax
I decided to give Dust of Ages another go

LOVE.


The subtle shadow of age...

 adding contrast and patina without too much warmth...

Perfectly highlighting all the yummy details!

I loved it so much, I went a little crazy

 A light application...applied with a small brush only in the recesses 


and a heavier application, applied with a giant brush all over

The pieces all turned out GORGEOUS...
have a look!


I'll share before and afters on these two chairs tomorrow...
and I promise, I'll get a picture of that awesome shelf
that you can only see a preview of above!

Thanks for stopping by!

Michele

Sunday, November 17, 2013

Front and Center

Last night, we shared some photos from the workshop area 
of our new shop

Here's a few pics from the gallery area up front!


 We have SO many pieces to still bring over...it's insane!

 Twinkly Fairy Lights at night make me so happy...
We leave ours on in the windows every night
For the Greek Festival, they've strung them from building to building down our street
It's lovely!

 Keegan and his friend didn't seem to mind the pile of tools in the back room!

 I have dozens more antique mirrors in my car right this very minute...
going up on the walls today!

 One of my favorite pieces

 and within 24hrs, I'd already moved stuff around!

 Don't you love our business card holder?  

 Our friend Tracey brought this back from Ohio and Kenny converted it to hold cards
then painted and glazed it

This lovely lady is tempting me...I really think I have to bring her home!
That being said...we need to buy more smalls!

We will be open today (Sunday 11/17)
for an impromptu Open House
if you're in the 
neighborhood!

Saturday, November 16, 2013

"Credenza"

We purchased this desk a few years ago...
I've been using it as my desk at the studio

The finish wasn't terrible,
so I left it wood...

Of course, it was eventually destined for paint!

We brought it to the new store as "filler" for the front room
while we were working...so when people peeked in, it would look nicely staged

Our goal at the new store is to always have a "work--in-progress"
so client's can see how the products we use work

So this desk became today's "work-in-progress"!

 I used Credenza from Amy Howard at Home
(One Step Paint)


 Gold Leaf gilds the hardware as well as the bottom edge


The entire piece has the most gorgeous, subtle shimmer...
accomplished by mixing Diamond Dust Mica Powder with wax

Tomorrow...the chair!

M~

Opening Day

If you couldn't make it out to see us yet,
here's a little tour around the new store!


 I'm adding window graphic installation to my resume :0) 
(we still have to order graphics for RMP and DBP)

 I wanted the black paint from the front to sort of spill over onto the white
in a Tim Burton-esque sort of way...mission accomplished!

 We turned this closet into a coffee bar
The countertops are laminate, and used to be an unattractive dark green
We custom mixed this rich turquoise color
(and don't you LOVE that chandelier???)

Our seating area for relaxing, reading a magazine, or having a cup of tea
(that sofa is soon to be re-upholstered in grey velvet...yum!)

 Amy Howard Home paints are all set up, looking divine
(yes, that is my dining room chair...what can I say, we needed extra seating!)

 On the shelf (literally...)
Amy Howard High Performance Lacquer in Begonia

 Real Milk Paint is all set up, too...
don't you LOVE that color against the magenta wall?

A glimpse of my GIANT worktable...
(and today's demo...I painted that desk)
The empty wall is soon to have a utility sink

The backside of my table has tons of storage...and BONUS it can be used as a fort

 Our little cash wrap station...isn't that map amazing?
The colors are awesome!

 The lighting from the huge window is perfection...

Kenny, being a good patient :0) 

These photos are all of the back area, where classes will take place,
and where I'll be painting every day

Today, I had such a GREAT time telling people all about what we do,
and why we love the products we use

I'd be perfectly content to paint and teach all day!

Tomorrow, I'll share photos from the gallery area of the store, up front

Hope you enjoyed the little tour!

M~

Tuesday, November 5, 2013

One Step Paint 101

We've been fielding questions lately
about how Amy Howard at Home's One Step Paint 
compares to other paints we've used...
while we wouldn't necessarily consider this "chalk-type paint"
we will explain the similarities and differences
as we've noted them

We've used just about every brand available
(and a few that aren't even on the market yet)
so we have a great basis for comparison

Clearly, we love the product because we 
decided to become retailers for the brand
(after considering numerous others)
but this is our true, unbiased opinion

If we didn't believe it to be wonderful in nearly every aspect,
we would not have jumped in as retailers!

So... what "sold" us?

  It's great.
Simple as that!


Although we'll be retailing many products from Amy Howard at Home,
the One Step Paint seems to be the one most asked about

The collection consists of 34 gorgeous colors
light wax, dark wax, and Dust of Ages

You don't have to prep beyond cleaning your piece and making necessary repairs
and you don't have to prime

We like to tell people to follow common sense practices
If the surface is super shiny, or covered in latex,
you might want to do a little prep work

It's up to you, though!

(Cartouche Green)

The paint itself is smooth, and a bit silkier than other chalk-type paints we've used
We're accustomed to having to water-down our second and third coats
because after the first coat, you know it gets harder and harder!

(Selznick Grey)

Like similar paints, the pigment can settle to the bottom
so always shake/mix well before using
Much like other furniture paints, this paint does have a bit of texture to it..
you'll have subtle brush strokes
For us, it's a sign the item was hand painted 
and lends to the character of the piece

One of the biggest benefits of One Step Paint is that it 
DOES NOT NEED TO BE SEALED

Yup, you read that correctly!

Un-waxed, the finish is satiny
(not chalky) but matte

We did a little test,
 (ok, so it was an accident...but it all worked out!)
and dripped some iced tea on an unsealed surface
it wiped away, without leaving a mark
Color us impressed!

We do love the subtle sheen wax gives a surface,
and Amy's wax is so soft and easy to apply...
we were literally SHOCKED at how quickly we finished waxing a dresser
and because we applied with a soft rag instead of a brush,
the surface took on a gorgeous, buffed shine
When I think of the time we have applying wax and buffing it off
(and buffing, and buffing, and buffing some more!)...yikes.
This was a VERY welcome change!


Amy's Dark Wax  isn't meant to be applied all over the piece
(BIG change for us!)
but instead, applied gingerly into the areas that would naturally darken
As a finishing touch, Dust of Ages can be applied 
to tacky wax for an authentic aged appearance

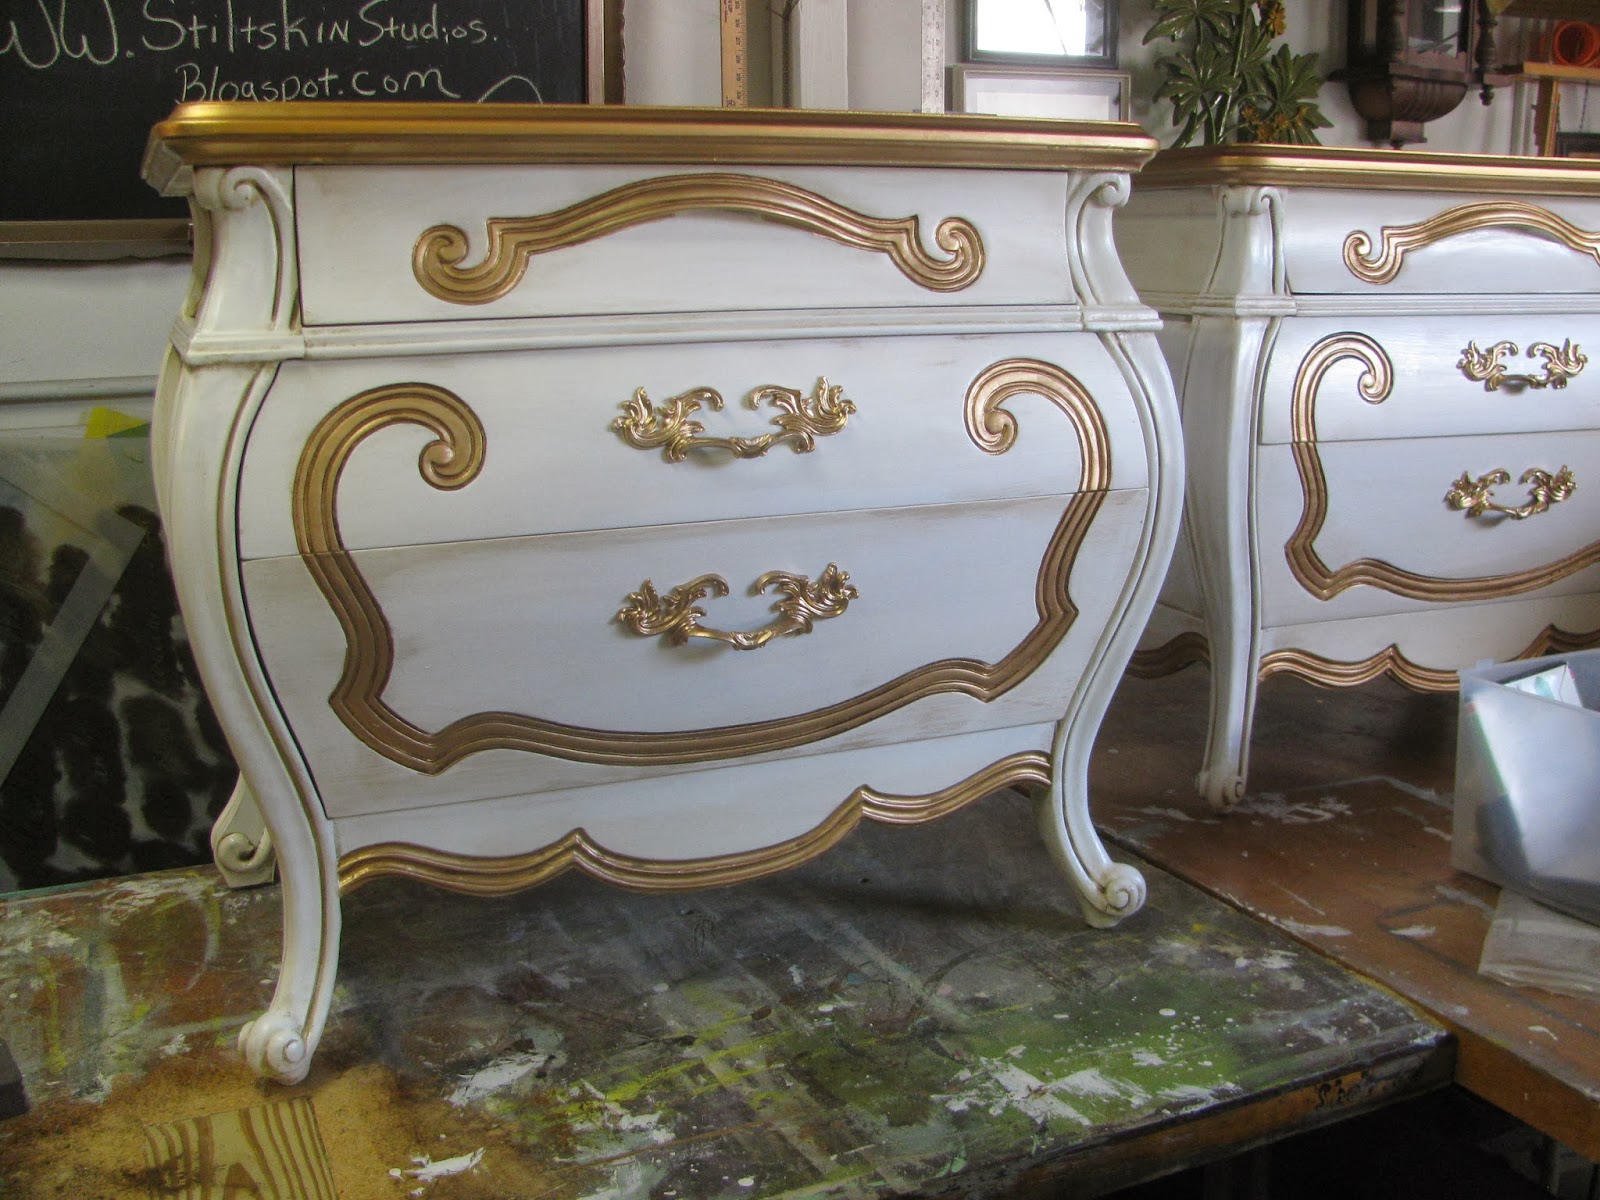
(Bauhaus Buff with Gold Leaf)

Another difference worth mentioning is one of the 
big reason's we embraced this product

Have you ever been buffing the surface of a piece painted with chalk-type paint
and the raised areas and drawer edges buff away?
This is fine if your piece is distressed, but we don't always want 
whatever is underneath to show through

One Step Paint?
It doesn't budge unless you want it to...

(see, no wear on the edges!)

That being said, we're still experimenting with the best method of distressing
for the times when we DO want it to rub off...

That's another post!

Overall, we have been consistently WOWed by this collection...
the color range is divine
(how many shades of grey?  Be still my heart!)
and the entire line has a certain air of LUXURY about it...
Almost decadent....

And luxury comes at a price, right?
Would you believe me if I told you it retails for LESS
than the other paints we've used!
$30/Quart

WE KNOW, RIGHT?  
Crazy!
Crazy good. 

Michele