Thursday, January 30, 2014

Toscana Powder Paint

It's no secret that we LOVE to get our hands dirty
with new products...
particularly when the products AMAZE US

We've been consistently thrilled and impressed by 
Amy Howard Home's product lines
(and the bar was set PRETTY high...we don't impress easily!)

One Step wowed us
then, the Lacquer Sprays...
so of course, we could NOT wait
to get our hands on Amy's Casein (milk) Paint...Toscana!


Amy's artisans create INCREDIBLE finishes using this paint, along with some ancillary products

(photo courtesy of Amy Howard Home)

We figured we'd break you in gently...
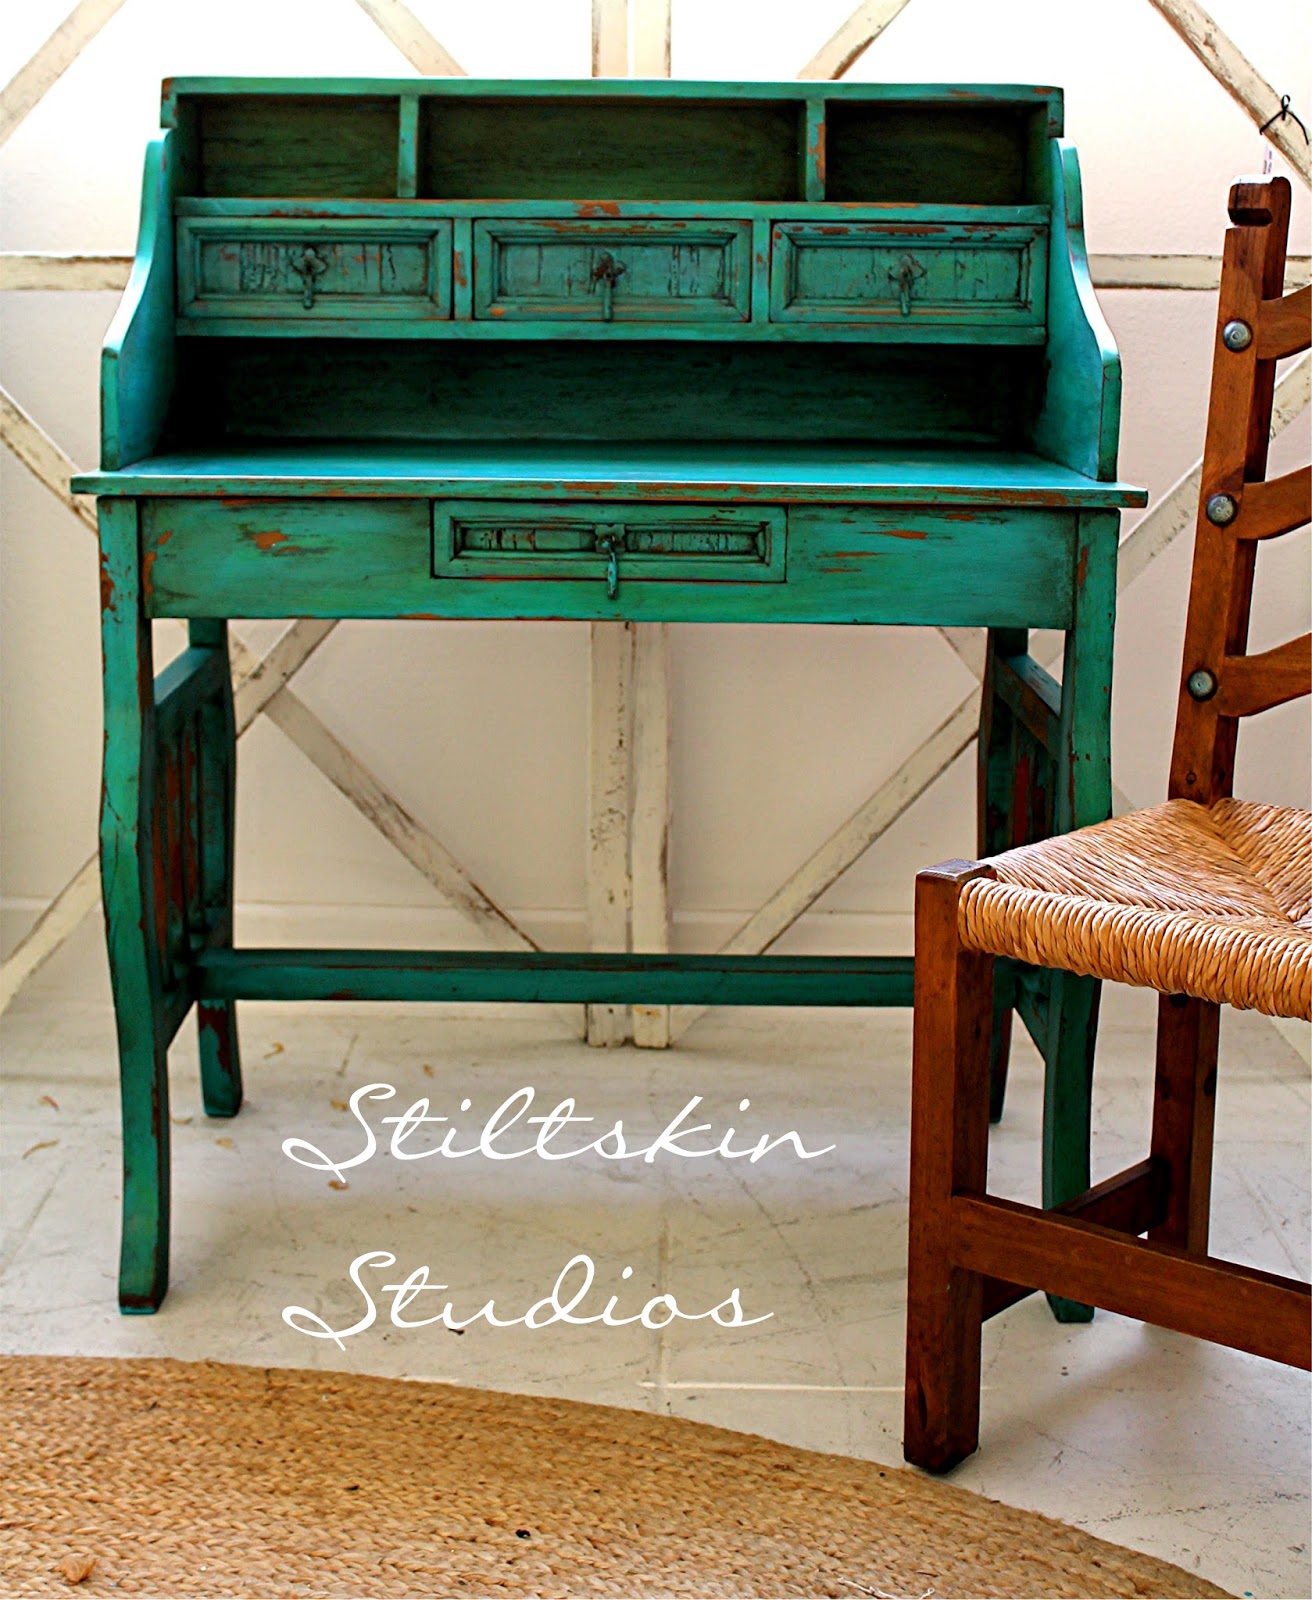
and show you a project using JUST the Toscana paint
(we'll be offering classes on how to use all the Toscana products in March!)

Toscana is quite simple to use...if you've used any milk paint before, this is much the same
you mix with water 
(we LOVE that the container has enough room to add water, seal, and shake to mix!)
We prefer our paint a bit on the thick side, so we start with a 3/1 ration of paint to water
adjusting as needed

The piece we selected was solid wood, and we did NOTHING to the existing finish
(old stain and some sort of clear lacquer)
The biggest obstacle to success with milk paint is in selecting the proper piece...
this is NOT the paint we'd select for shiny finishes, laminate, etc

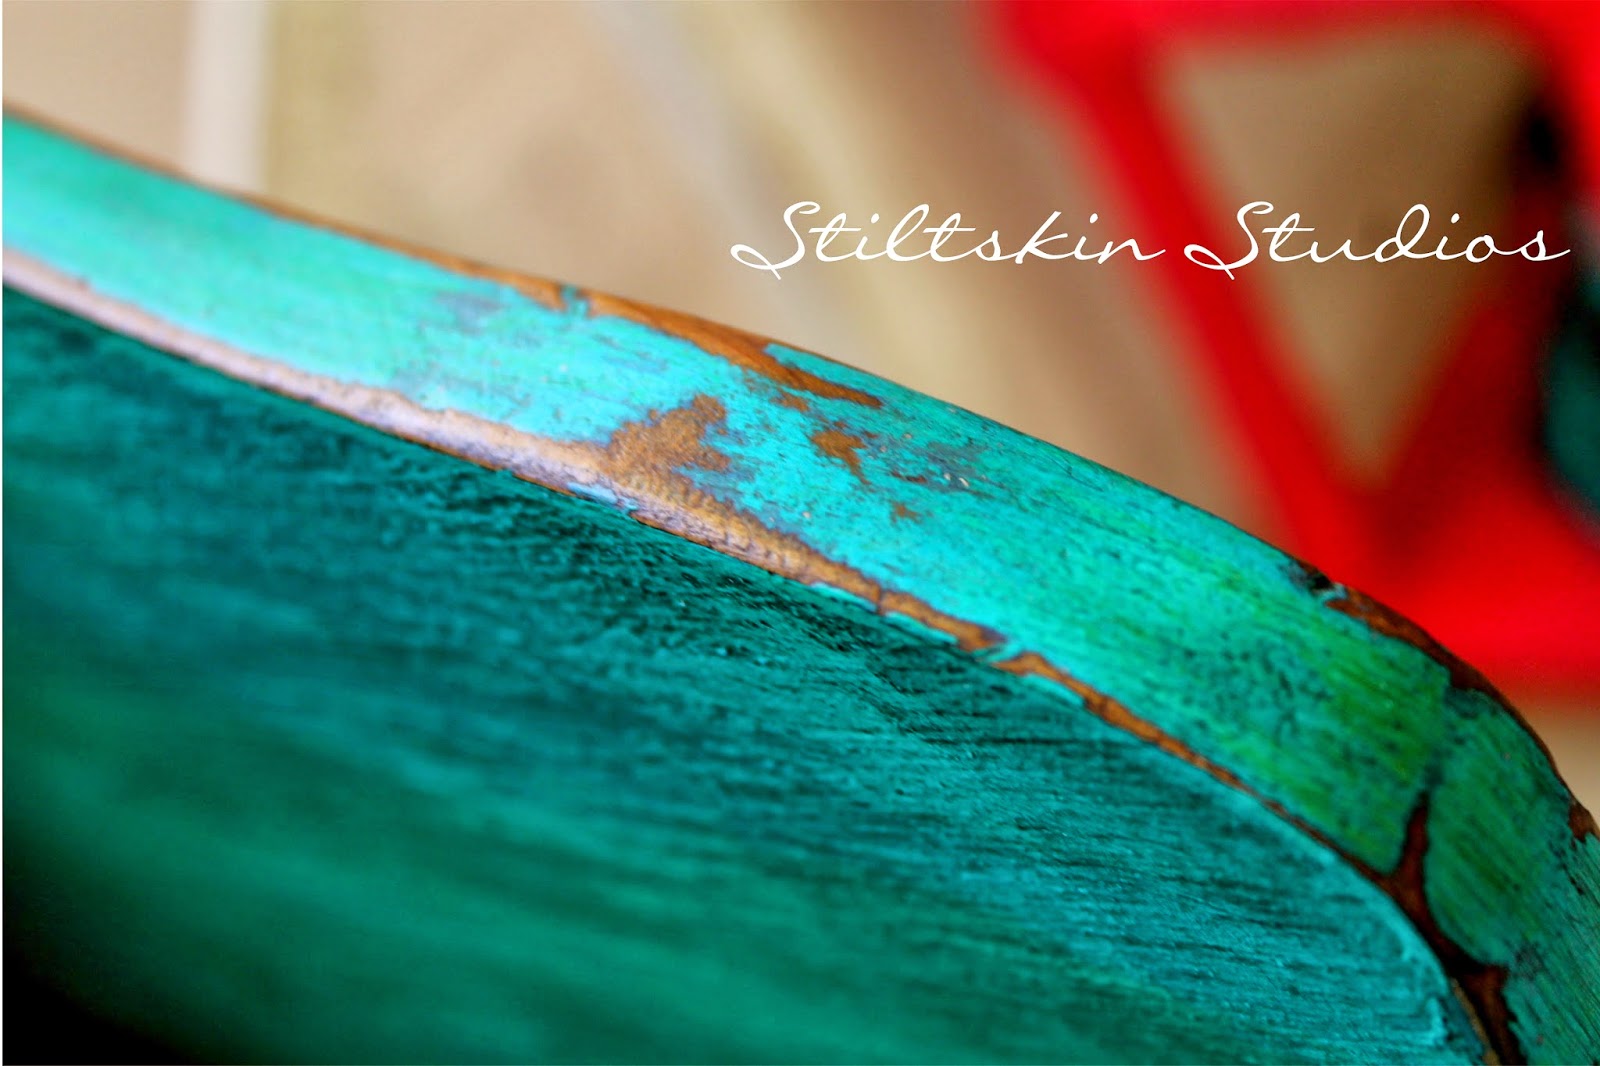
So anyway, we mixed it up, and applied in a very haphazard, sloppy manner
sort of squishing it in here and there instead of brushing it smooth


The finish you see took three coats
We love the variations of texture and color!


For even more patina, we used Amy's Antique Glaze
which is very thin and light
(translation: EASY and FORGIVING)
It really brought so much depth to the finish 
without dramatically altering the lovely, soft shade

Once dry, we sealed with our favorite Carnauba wax

Toscana is available in a lovely selection of colors and retails for $20/8oz


We are SO terribly excited to be travelling to Memphis, TN in a few weeks
to meet Amy Howard and the rest of her team

A bit about Amy Howard, in case you didn't already know!
Her company, Amy Howard Home, has been around for almost a quarter of a century
(they are most definitely NOT new to this!)

The paints we retail, and the finishes you can achieve with them,
are the very same that have been used on Amy's gorgeous reproduction pieces

For some inspiration, visit 
and of course Amy Howard at Home

Thanks for stopping by, and happy painting! 

Kenny and Michele

Tuesday, January 28, 2014

Spring Break in Mexico?

Our style is hard to pin down...we love so many...
French, Gustavian, Mid Mod, Farmhouse...
Spanish/Mexican is definitely something different for us, though!

Great lines, right? 
And we LOVE the rustic vibe it's got goin' on

We thought about painting it white for a nano-second,
but decided to honor the heritage of this Mexican import


We used five different shades of blue and green milk paint
and a rich, tomato red inside the big drawer

 We applied layer upon layer
not waiting for each layer to completely dry
so the color variations flow into one another

 The milk paint, as usual, did a spectacular job of chipping...

 We used Antique Glaze from Amy Howard Home 
applying multiple layers (it's a watery glaze, very subtle and build-able)
once that dried, we sealed with carnauba wax
This combination REALLY made the variations of color stand at attention!

 The colors remind us of the ocean...ranging from deep blue to aqua, turquoise, and green


We left the chair in it's natural state, 
only adding a bit of stain to add depth to the wood
The metal rivets along the back have been highlighted with shades of green and aqua
to mimic weathered copper's verdigris finish

Rustic and loaded with character, patina, and charm...
this desk is the perfect piece for a neutral room...
can you imagine all that chippy goodness
 coupled with the warm wood of the chair
in an all white room?  
Yes, please!

You can find this charming desk set in our Etsy shop

Saturday, January 18, 2014

If it's FREE, it's for ME

We've always thought it was a little strange
to pay hundreds of dollars to learn to use a paint product you just bought...

Of course, there is great value in learning tips and tricks
from someone with experience
but shouldn't the basics be available to anyone 
that wants to try the paint? 

We think so. 

So, in the spirit of paying it forward,
we're going to offer FREE classes each month

Now, don't get too excited...
(ok, you can get excited, it IS exciting!)
these will be BASIC classes...

Enough to give you a solid foundation 
and the courage to pick up a brush and dip into that paint
but we won't be sharing ALL our secrets


These classes will be fun and no-frills...
you won't go home with a cute apron 
we won't be feeding you breakfast or lunch
(just chocolate and coffee/tea/cocoa!)
and you'll need to bring your own SMALL item
(wooden candle sconces, a small shelf, a frame...you get the idea)
 we'll provide the paint, wax, etc


The idea is that we WANT you to try the paints we carry
we WANT you to be comfortable purchasing them,
because you've used them and have an idea how they perform
We've all spent hard-earned dollars trying new products,
only to have them gather dust because they didn't do what we wanted
or we couldn't figure out how to make them work well
(hello, dark wax!)


We only sell things we LOVE, so we know you'll LOVE them, too
once you try them!


We think it's a WIN/WIN

Our next FREE class is Saturday, Feb. 1 at 11am
Featuring Amy Howard Home One Step Paint
Wax, and Dust of Ages
Limited to 10 students
Registration required
stiltskinstudios@gmail.com

Hope to see YOU soon!

Kenny and Michele


Friday, January 17, 2014

French Script Bergere

You know that saying...
If you think hiring an expert is expensive, wait until you hire an amateur!

In this case, the amateur is ME, and I'm SO happy I passed this chair
on to an expert for the upholstery work...

SO WORTH IT!

Here she is, naked
(the chair, not the upholsterer...this isn't THAT kind of blog!)

Dated blonde wood, and she has shiny taffeta 
striped upholstery in a lovely shade of pale peach!

I painted the frame in Bauhaus Buff One Step Paint from Amy Howard Home
 over a coat of Fluff from Dixie Belle

Why the two paints?
Fluff is the best coverage from a white paint I've ever seen
but I wanted the smoother finish One Step Paint provides

Once dry, I waxed the entire piece with clear carnauba wax
before going back over the details with more wax
in small sections,
applying Dust of Ages from Amy Howard Home
before the wax was completely dry


I adore the way Dust of Ages gives an aged patina 
without really changing the over-all color of the paint
Dark wax tends to warm up white quite a bit, and I didn't want this for this chair

Isn't the fabric great?  
Cream and dark grey imprinted with French graphics...PERFECTION!

Speaking of perfection...the self-welt trim is amazing...
it looks so high end


I love how this pieces mixes with the soft hues of the dresser in the background...
and how about the  back of the chair?
see it peeking at you from the mirror?

Dark grey and cream chevron offers a graphic impact

I purchased these fabrics quite awhile ago, and used the chevron to line a hutch...
leaving a small amount of extra...very happy it was enough to do the back of the chair!


Like the dresser in the background, this chair matches my home a little TOO well...
it would fit seamlessly into my living room

If I still own it in a week, I do believe it's coming home with me!

Wednesday, January 15, 2014

Grey Linen Cottage Dresser

I was minding my own business yesterday,
headed back to the store with my lunch
(on foot)
when I wandered into an antique shop along the way
Tarpon Ave is LOADED with antique shops
and this one in particular has been having a
GOING OUT OF BUSINESS
sale for about a year 

There, amid all the glassware and smalls,
sat this cutie


Since it was only a few blocks from shop to shop 
(theirs to ours)
I grabbed our dolly and hoped for the best!
Happily, the dresser and I both made it back to our store in one piece!
(the old brick roads and narrow sidewalks are not dresser friendly!)

I hoped to preserve the wood top, but there was veneer damage and some deep stains
so I accepted the fact that it needed paint and got busy,
saving the top for last
(hoping for some sort of inspiration!)

The body is painted in Amy Howard Home's One Step Paint
in Luxe Grey (LOVE) and the details, as well as the two large drawers
are painted in Bauhaus Buff (also AHH)


There seems to be a misconception that One Step paint can't be distressed,
which clearly is NOT the case, as this piece has moderate distressing along the edges


One Step Paint doesn't unintentionally distress
(you know, like when you're buffing and the paint comes off the raised areas 
even though you didn't want it to?)
so you'll have to apply gentle pressure with a medium grit sanding block for this effect
(haven't tried other methods yet, will update as we do)

Instead of wax, I chose to finish this piece off with a glaze
Once dry, I gently sanded the surface for a weathered look


As I was sanding some paint off the lip of the top, I started LOVING
the look of the wood, just that frame around the top
so I taped it off before I painted the top of the dresser
then glazed the whole thing to add richness to the wood without making it look too "new"
(don't you think it looks sort of weird when the body is distressed and the top is all shiny and perfect?)
 (as you can see, the new drawer stops were added AFTER I took pics...OOPS!)


The hardware sort of disappeared against the wood, 
but now, it's showcased so beautifully

The mirror is also original, and has all the patina you'd hope for in a piece of it's age
I highlighted the layers surrounding the mirror for a bit of added detail


I'm head over heels in love with this dresser...it's a perfect fit for my home
if only it actually FIT somewhere in my home...isn't that always the trouble?

Alas, you can find this piece in our Etsy Shop