Thursday, August 30, 2012

Stencil 101

We don't do too many tutorials...
but sometimes, we get so many questions about the same topic
we decide to tackle it...

 "What's the best way to stencil?"
Is one of those questions!

But, alas, you see...
we're no experts on stenciling!

Do you know who is?
The folks at 

Regina, who works with RDS
(you might know her from Fauxology)
was gracious enough to offer us an impromptu class,
sharing Melanie's techniques and tips
so our tutorial would be full of great info!

So here goes:

 Step one:
Start with the proper tools!
(We can't emphasize enough
what a difference these tools made!)
both from 


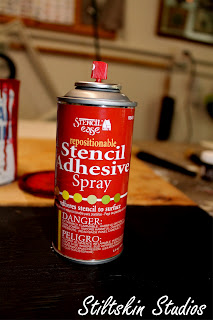
 I like to use adhesive spray, but
Frog Tape works great, too!

Apply a LIGHT spray of adhesive
before placing your stencil

 For this project,
we chose
(we have an actual furniture project planned for this stencil,
this was our trial run...!)

 You'll want to have a rag or paper towel handy...

 barely dip your brush into the stencil creme or paint
(or just use the lid...you don't need much!)

Now swirl your brush onto your rag
to remove the excess paint

 (excuse my wax-stained hand!)
Your brush might seem like there is nothing on it...
but as illustrated here,
it's plenty!

 Once your brush is ready,
you'll want to apply the creme in a swirling motion
like little circles with your brush
(A great tip we learned?
Start your swirl outside the area to be filled in
so any extra bits get worked out
before the paint touches the open stencil area)

 For the stem, we used Stencil Creme,
but for the blossoms, we wanted
soft pinks...so we used Annie Sloan Chalk Paint
(did you know Royal Design Studio is a Chalk Paint Stockist?)

 We hoped to demonstrate what happens when you 
use too much paint, and just brush it on instead of swirling...
see all that bleed through?
(also note, the Stencil Creme still looks perfect,
even though we attempted to do that wrong, too...
not sure you CAN do it wrong with these cremes!)

 For the second branch, we did as instructed,
barely filling our brush
before blotting off the excess

 The Cherry Blossom Stencil comes with a variety
of stencil sheets, so you can create your own pattern...
we simply waited for the first to dry
(the cremes dry almost instantly, and ASCP is nearly that quick, too!)
then placed the next one...
LOVE that we can create our own unique pattern
based on the piece being stenciled! 

 Clearly, following the directions is the way to go,
because THIS branch appears almost airbrushed,
it's so crisp and lovely...
this is with NO touch-up!
Gorgeous, right?

(Be sure to remove your stencil before the paint is completely dry...)

 Even though this was just a sample board
(plywood, no less!)
we wanted to finish it off properly,
after distressing
Notice the wax did NOT remove
 the metallic Stencil Creme...
which is unusual, 
and AWESOME!
We've used lots of other metallic products,
like gilding wax and Rub-n-Buff
but you can't wax over them
which can be a bummer

The final step to insuring your next project is perfect?
Clean your brushes right away, 
and clean your stencil right away, too!

The Stencil Cremes are formulated for easy clean-up
We simply placed the stencils on a flat surface and gently 
sponged off the paint
If you're not using Stencil Cremes
or you are a total slacker and don't wash them right away,
try Simple Green...works great!

 Once they are dry, we'll store these on our stencil wall
with tiny nails...
I know, you don't have a stencil wall...
No worries!
Just be sure to store them flat

This was a really fun project
and it's tremendous how much
easier it was to do
and how much better
it turned out
with a little instruction
and the proper tools and products! 
We're really looking forward to tackling the bigger project
with this stencil...

...and you KNOW
we will be ordering EVERY COLOR
in the Stencil Cremes!

Tuesday, August 28, 2012

Warm Fuzziness and Stencils

We've been feeling very fortunate lately...
 
fortunate to be doing something we love
 
fortunate that it's turned from a hobby
into a legitimate business
 
and most of all,
 
fortunate to be surrounded
by people who constantly inspire us
and in turn are inspired by us

It's like this little community
of creativity, support, and general goodness!
 
Speaking of  positive, wonderful people
that inspire us...
 
Stiltskin Studios was recently invited by the 
lovely Regina of Royal Design Studio 
to participate in a private stenciling class
(Regina is amazing and wonderful and gorgeous...and camera shy!)
 
 
My cohort? 
None other than a member of our mutual admiration society,
Jessica of Stellar Junk! 

(I know, isn't she just about the cutest girl ever?)
 
 We learned how Melanie, of Royal Design Studio
likes to stencil
(also known as the right way...lol!)
and we practiced and played
and generally had a wonderful evening


A big THANK YOU
to the ever-gracious
Jeremy, Greg, and Karsen
for allowing us to use their space!  
 
Of course, while we're gushing about motivation and support,
we can't leave out Miss Annie Sloan...
had I not discovered her amazing products
I probably would not even know these amazing people!
 
Thanks, Annie.

Seriously, we really try to support
genuine people...nice people
honest people...
and it doesn't get much better than these folks!

Stiltskin Studios will be featuring another 
stencil project in a few days,
accompanied by a tutorial
so be sure to come back and visit!

Friday, August 24, 2012

Burnishing Paste...LOVE!

We had some fun this week
playing with Milk Paint from


We love Milk Paint
(don't worry, we still love our ASCP, too!)
and this piece was very well-suited to Milk Paint

It was solid wood, the varnish was old and mostly gone
and we didn't care if it got all chippy and crackled...
in fact, we hoped it would!
We selected Pearl and French Grey


We usually seal our Milk Paint projects with wax
but Dwayne from RMPC encouraged us to try
Burnishing Paste


It comes flat or low sheen
we chose low sheen


It has a very creamy consistency and spreads very easily
No buffing was required...
just brush it on and leave it alone

RMPC has a great tutorial,
so if you'd like to learn more about how to use this product
visit them on youtube

We were very brave,
 and decided to give the paste a whirl
over ASCP

It worked great!
It doesn't buff to a sheen like Annie's wax
but it did spread well and protect the surface

Emboldened by our success with the paste,
we decided to apply dark wax over it to see what would happen!

More on that Sunday :0)

Monday, August 20, 2012

Frenchy Finds on a Gorgeous Monday

Today was the first day back at school for the boys...
which of course meant a whole day
with no kids!

We started off at UPS, picking up
our box of goodies from

Very excited to bust into everything
and try all the new products! 

We intended to go back to the studio and paint
but of course, got sidetracked along the way...

Stops one and two left us empty handed...
(Habitat for Humanity and Hospice)

so we took a break and had some fish tacos...

We stopped by one of my favorite furniture shops
and visited with the owners, before purchasing
this cute little French Provincial bedside table

We left behind a great bench and a French Provincial rolling buffet...
who knows, they may still end up in our hands!

On the way to another thrift shop, Kenny talked me into stopping
at a local "antique mall"
I am not a big fan of this particular shop...
it feels like a glorified junk shop
just sort of a big hodge-podge of stuff, from clothing and shoes
to modern home decor and antiques
I prefer a much more edited selection, and typically drive right past
but today, I eye-spied THIS!


Super gorgeous, right???
May just become my new desk chair!

On down the road, at the next shop,
we scored these


The bachelor's chest is the perfect size for an entryway
or in a bathroom...
and how great is that shelf??  
It's HUGE, solid wood, and just fabulous
(underneath all the dust!)

I didn't get pics of the two dressers we also purchased
from CL sellers, because they were too 
cumbersome to unload, photograph, and reload
before delivering to the studio...
guess you'll have to wait for their grand reveal!

What wonderfulness have you found lately?

Thursday, August 9, 2012

Serenity Dresser


This dresser needed MUCH love
when we brought it home...

That's Kenny's department!
I knew I wanted soft, serene colors for this piece
It had already been through enough!


 We custom mixed this gorgeous, soft color
It was inspired by a color called "Sugar Cane"


I love the bow-front,  the pretty details on each side
I love the hardware...oh, who am I kidding, I love it all


In case you're curious, this piece was done
with milk paint with Bonding Agent added


We stripped the top, but haven't stained it yet...
Stain it, paint it...I'm leaving that decision to the buyer!

What have YOU painted lately?

Tuesday, August 7, 2012

Chartreuse (aka Pea Soup)

This mirror...so lovely
except is was COVERED 
in bright gold GLITTER paint
 
yep, I said glitter
 

It's solid wood
super heavy
and the carved details are really cool


The obvious choice was to paint this mirror
in a soft, "shabby" color
to compliment the carved hearts and flowers...

...we try to avoid the obvious choice


Coat one went on...
Kenny painted it in Hunter Green milk paint
 
now, I do love green, but the dark color
seemed to obscure the details too much
so while he was busy with something else,
I mixed up some deep aqua milk paint

You can see it peeking through here and there


It was pretty, but I really was craving something different!
I mixed up a crazy concoction of milk paint until I got a color
that resembled chartreuse


PERFECTION!

Completely different, unusual, and vibrant
while still being elegant
 
Good thing it's still a shade of green, 
otherwise I'd have an unhappy husband to contend with! 

We did a bit of distressing, toned down the vibrancy 
a little with Dark Wax
(for a tutorial on waxing, click HERE )

It's a bit classic, a bit funky...
and a bit unexpected

Just like us!