Showing posts with label furniture paint. Show all posts

Friday, March 28, 2014

Oooh....shiny!

GOODNESS GRACIOUS!

What a WHIRLWIND life has been around here!

I know you're itchin' for more details and photos from around the plantation,
and we PROMISE they will be coming soon

For now, though, I believe I owe you a little tutorial, right?

Want to make things sparkle and shine? 
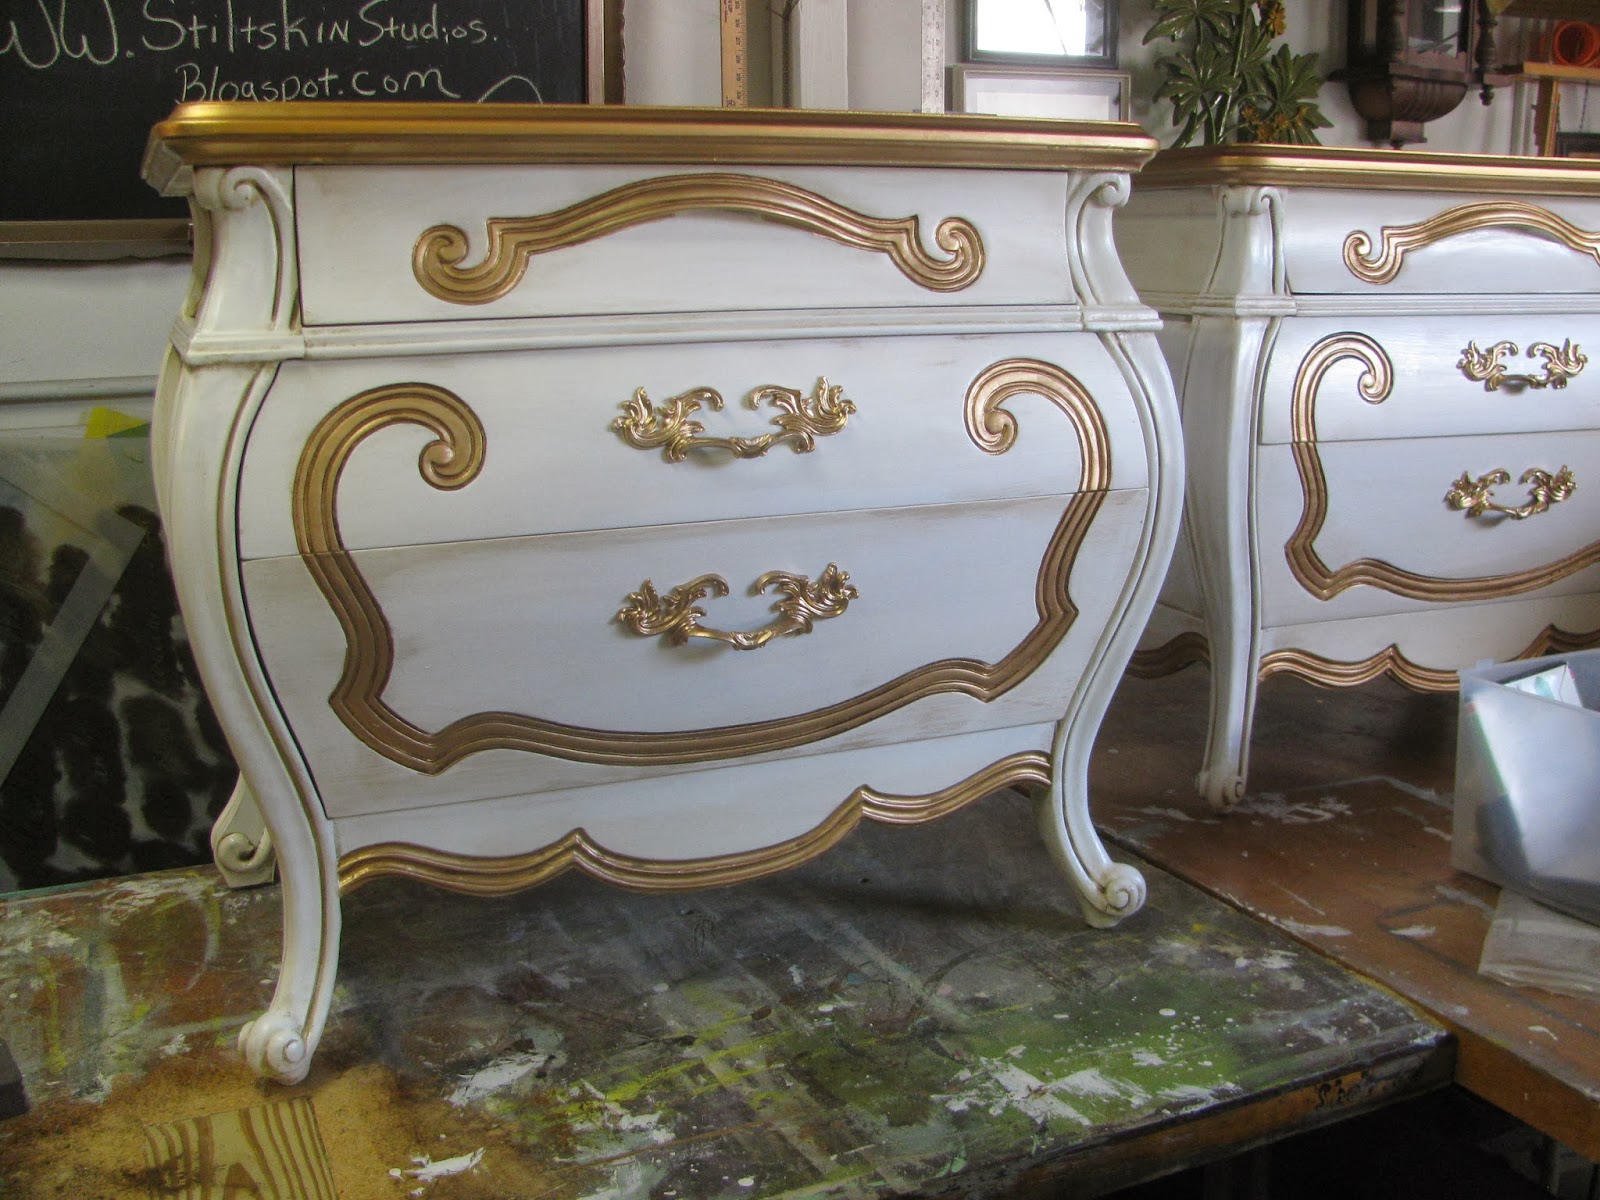
How about a little gold or silver leaf...

 (actually comes in sheets...this is my pile of debris...but it is still SO pretty!)

Step one is to paint your piece (if desired) with the paint of your choosing and allow to dry
(I used Amy Howard at Home One Step in Palmer Pink)


Next up is applying Bole (pronounced like bull)
Historically, Bole was clay-based, and used to make the leaf really "POP"...
the color of Bole is dependent upon the type of leaf (silver, gold, etc) and the desired effect
(I did a project with Bole and a project without...both are lovely)

Keep in mind that some of your Bole color will inevitably show through the holidays 
(areas where there is no leaf), and the brownish red under gold is very authentic

 The Bole will look like the ugliest paint color ever...but fear not!

 it gets LOADS better, I promise!

 Once the Bole is dry, you'll want to apply Size
Size is what makes the leaf stick
so you'll want to be aware of your coverage

Sparse coverage will give you a sort of mottled effect
while more thorough coverage leads to more complete coverage with the leaf

When the Size is tacky 
(use your ring finger to test...does it resist and stick a bit?  Perfect!)
you can begin to apply the leaf

The leaf is sold in sheets, and for this project,
 I cut a portion down to size by cutting the entire book in half
(photo above shows the already-cut sheets)
I used these more narrow sheets for the smaller trim work,
 and used the full size sheets for the legs

You'll want to apply the leaf sheet directly onto the Size, 
and avoid touching it too much with your fingers

See the orange tissue sheets that separate the leaf in the photo above?
If you keep your leaf attached to the book,
you can use that tissue to burnish over the leaf with your finger

Once you place your leaf, burnish, and remove the tissue
you will want to smooth over the leaf with a fairly firm brush

 See the areas where the reddish Bole is peeking through the gold leaf?
Those are the holidays

After you're satisfied with the leaf application, you're ready to seal the finish with wax
Can I tell you how HAPPY this makes me? 
 Wax does NOT remove the leaf...
if you've used Liquid Leaf and some other gilding pastes, 
you'll know exactly what I mean


 Ta-Da~!
So fancy :0)  

On a completely unrelated note...
I had this genius idea to plant miniature rose bushes in my old paint cans...
I say "genius" in jest...because I kill plants
Also, by "plant" I mean I ripped them from their little containers and crammed them,
dirt and all, into the paint cans

By some miracle, they did NOT die...
(well, at least SOME didn't die!)
and the little rosebuds are shades of pale pink and magenta...amazing

Be BRAVE and try silver or gold leaf...it's messy, its fun, and it's GORGEOUS!

M~

Saturday, November 16, 2013

"Credenza"

We purchased this desk a few years ago...
I've been using it as my desk at the studio

The finish wasn't terrible,
so I left it wood...

Of course, it was eventually destined for paint!

We brought it to the new store as "filler" for the front room
while we were working...so when people peeked in, it would look nicely staged

Our goal at the new store is to always have a "work--in-progress"
so client's can see how the products we use work

So this desk became today's "work-in-progress"!

 I used Credenza from Amy Howard at Home
(One Step Paint)


 Gold Leaf gilds the hardware as well as the bottom edge


The entire piece has the most gorgeous, subtle shimmer...
accomplished by mixing Diamond Dust Mica Powder with wax

Tomorrow...the chair!

M~

Tuesday, November 5, 2013

One Step Paint 101

We've been fielding questions lately
about how Amy Howard at Home's One Step Paint 
compares to other paints we've used...
while we wouldn't necessarily consider this "chalk-type paint"
we will explain the similarities and differences
as we've noted them

We've used just about every brand available
(and a few that aren't even on the market yet)
so we have a great basis for comparison

Clearly, we love the product because we 
decided to become retailers for the brand
(after considering numerous others)
but this is our true, unbiased opinion

If we didn't believe it to be wonderful in nearly every aspect,
we would not have jumped in as retailers!

So... what "sold" us?

  It's great.
Simple as that!


Although we'll be retailing many products from Amy Howard at Home,
the One Step Paint seems to be the one most asked about

The collection consists of 34 gorgeous colors
light wax, dark wax, and Dust of Ages

You don't have to prep beyond cleaning your piece and making necessary repairs
and you don't have to prime

We like to tell people to follow common sense practices
If the surface is super shiny, or covered in latex,
you might want to do a little prep work

It's up to you, though!

(Cartouche Green)

The paint itself is smooth, and a bit silkier than other chalk-type paints we've used
We're accustomed to having to water-down our second and third coats
because after the first coat, you know it gets harder and harder!

(Selznick Grey)

Like similar paints, the pigment can settle to the bottom
so always shake/mix well before using
Much like other furniture paints, this paint does have a bit of texture to it..
you'll have subtle brush strokes
For us, it's a sign the item was hand painted 
and lends to the character of the piece

One of the biggest benefits of One Step Paint is that it 
DOES NOT NEED TO BE SEALED

Yup, you read that correctly!

Un-waxed, the finish is satiny
(not chalky) but matte

We did a little test,
 (ok, so it was an accident...but it all worked out!)
and dripped some iced tea on an unsealed surface
it wiped away, without leaving a mark
Color us impressed!

We do love the subtle sheen wax gives a surface,
and Amy's wax is so soft and easy to apply...
we were literally SHOCKED at how quickly we finished waxing a dresser
and because we applied with a soft rag instead of a brush,
the surface took on a gorgeous, buffed shine
When I think of the time we have applying wax and buffing it off
(and buffing, and buffing, and buffing some more!)...yikes.
This was a VERY welcome change!


Amy's Dark Wax  isn't meant to be applied all over the piece
(BIG change for us!)
but instead, applied gingerly into the areas that would naturally darken
As a finishing touch, Dust of Ages can be applied 
to tacky wax for an authentic aged appearance

(Bauhaus Buff with Gold Leaf)

Another difference worth mentioning is one of the 
big reason's we embraced this product

Have you ever been buffing the surface of a piece painted with chalk-type paint
and the raised areas and drawer edges buff away?
This is fine if your piece is distressed, but we don't always want 
whatever is underneath to show through

One Step Paint?
It doesn't budge unless you want it to...

(see, no wear on the edges!)

That being said, we're still experimenting with the best method of distressing
for the times when we DO want it to rub off...

That's another post!

Overall, we have been consistently WOWed by this collection...
the color range is divine
(how many shades of grey?  Be still my heart!)
and the entire line has a certain air of LUXURY about it...
Almost decadent....

And luxury comes at a price, right?
Would you believe me if I told you it retails for LESS
than the other paints we've used!
$30/Quart

WE KNOW, RIGHT?  
Crazy!
Crazy good. 

Michele